 TgWitness
Documentation / 07
Export Telegram Chats & Verify Signed Evidence
Hand someone files they can check themselves against your workspace.
New to signatures and checkpoints? Change a sample record and see which checks catch it.
Keeping a copy away from the collector? Go to S3 setup, Object Lock or verified recovery.
Retain a trusted reference
Write down the workspace key fingerprint somewhere other than the collector. While collecting, turn on evidence mode so checkpoints get RFC 3161 and OpenTimestamps timestamps, or run a witness that posts to a public channel. Keep signed checkpoints elsewhere too: the recipient checks the key, the time and an earlier journal state against them.
Download the signed ZIP
Exports → signed evidence ZIP. It has the whole journal and a signed file manifest. Shape the readable report in Report studio, or send only selected data as a handover extract.
HTML, PDF and JSON reports carry their own seals. CSV is just a working copy; for integrity use the CSV inside the verified ZIP.
Verify with a trusted copy of TgWitness
In the project environment, with your own fingerprint and paths:
python -m tgwitness.verify evidence.zip --fingerprint TRUSTED_PUBLIC_KEY_SHA256 --tsa-ca TSA-ROOT.pem --checkpoint retained-checkpoint.json --require evidenceA pass shows key_pinned: true and checkpoint_checked: true. --require evidence also needs third-party time for the last record, such as a checked timestamp: the checkpoint is signed with your own key, so on its own it is not enough. Keep that output next to the archive. The checkpoint has to be at or before the end of the export.
Use the verification result
- Files: the manifest binds their hashes, the signatures bind the journal. Any change shows up.
- Identity: the fingerprint you kept proves it's the key you expected.
- Earlier state: a checkpoint compares the export with a journal prefix saved before the handoff.
- Coverage: gaps, acquisition results and a send → edit → delete test show what this setup actually caught.
Details: what verification proves.
Set up the S3 off-site copy
Exports → Off-site copy in your workspace. Works with AWS S3 and anything S3-compatible. It copies journal segments, saved files, checkpoints with their timestamps and finished chat exports, each encrypted with AES-256-GCM before it leaves the collector.
The online demo shows these controls with uploads off. Only enter real credentials in your own install.
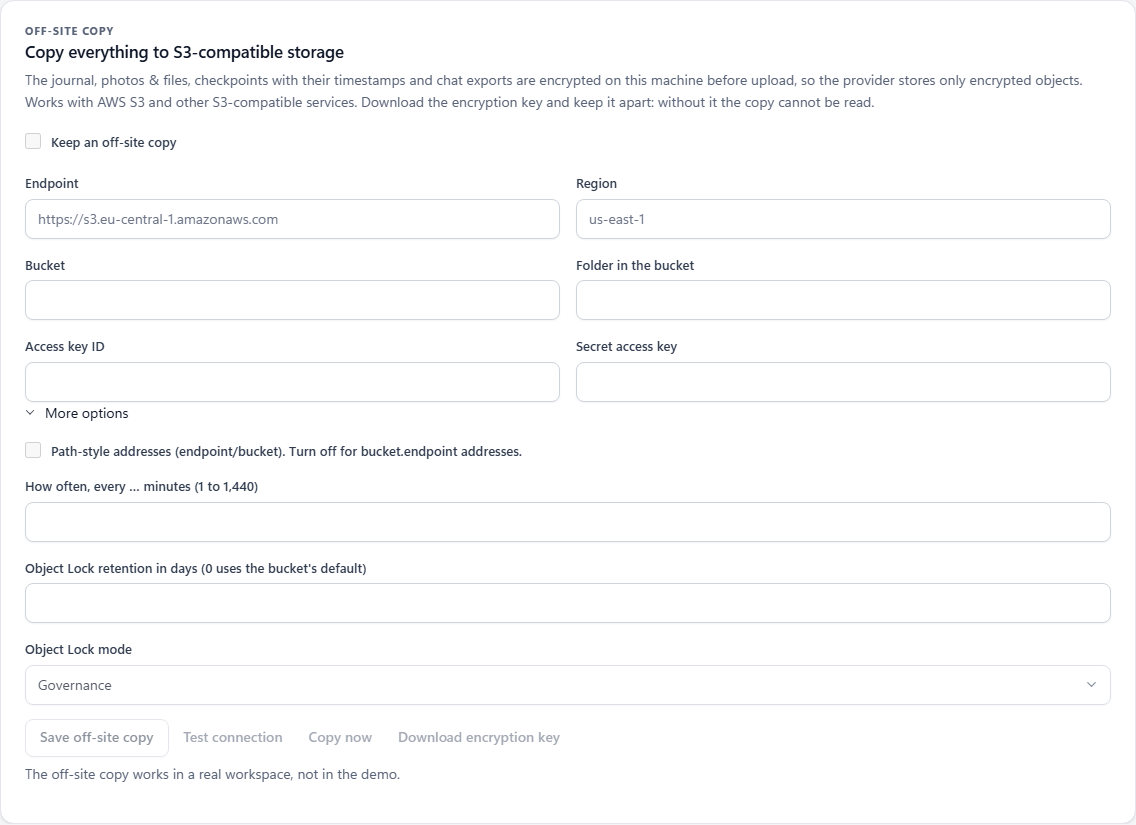
| Field | What to enter |
|---|---|
| Endpoint | Storage URL, no bucket path or credentials. Example: https://s3.example.invalid. |
| Region | Whatever your provider needs. Default us-east-1. |
| Bucket | An existing bucket you can write to. Example: example-case-backup. |
| Folder in the bucket | Prefix, default tgwitness. A per-workspace prefix is added on top. |
| Access key ID / Secret access key | Both together, stored in the vault. Leave both empty later to keep them. |
| Path-style addresses | On: endpoint/bucket. Off: bucket.endpoint. Depends on the provider. |
| Copy interval | 1 to 1,440 minutes, default 5. Only while the app runs. |
| Object Lock retention | Days and mode, if the bucket supports Object Lock. Zero keeps the bucket default. |
- Create the bucket, fill in destination and credentials with Keep an off-site copy unticked, hit Save off-site copy.
- Test connection uploads an encrypted test object.
- Download encryption key and keep it away from the collector. No key, no recovery.
- Tick Keep an off-site copy, save, then Copy now or let the schedule run.
Check retention and copy progress
Under More options pick retention days and GOVERNANCE or COMPLIANCE. TgWitness reads the retention back from an uploaded object and tells you: confirmed, missing or check failed.
The panel shows the last pass, object count, bytes, copied journal boundary and errors. A missing local file is reported and retried next pass, the rest keeps copying.
Uploads go over Direct, SOCKS5 or HTTP. With an MTProxy-only route the copy waits with an error.
Keep the recovery key separately
The key JSON has the decryption key, destination, prefix and key fingerprint. For recovery you need it plus storage credentials with read access.
Changed endpoint, bucket or prefix? Download the key again. A fresh copy starts at the new destination; old chat exports stay where they were.
Restore and verify on another machine
You need a TgWitness install you trust, the key JSON, read-only storage credentials and an empty folder:
Windows PowerShell
$env:TGWITNESS_S3_ACCESS_KEY = 'YOUR_READ_ACCESS_KEY'
$env:TGWITNESS_S3_SECRET_KEY = 'YOUR_READ_SECRET_KEY'
python -m tgwitness.replica restore --key-file tgwitness-replica-key.json --out restored-evidence
Linux / macOS
export TGWITNESS_S3_ACCESS_KEY='YOUR_READ_ACCESS_KEY'
export TGWITNESS_S3_SECRET_KEY='YOUR_READ_SECRET_KEY'
python -m tgwitness.replica restore --key-file tgwitness-replica-key.json --out restored-evidence
Everything is checked in a private temp folder first: the whole journal, checkpoints, file hashes and sizes. Unsafe paths, conflicting segments or a journal shorter than its checkpoint fail, and then nothing is written out.
On success you get events.jsonl, media/, checkpoints/ and exports/. Keep the command's JSON output with them, and compare against checkpoints or witness records you kept yourself.